Blog

  • Install PHP-FPM and MySQL on nginx in OS/X Mountain Lion

    I found a good walkthrough the easy way at this page

    I’m replicating the text here in case it’s gets lost but the credit goes to Matthew Holt

    _______________

    What follows is the text taken from Mathew’s blog:

    Install Homebrew

    In case you haven’t already, install Homebrew by following the instructions at the bottom of this page.

    Homebrew’s most legit PHP “tap” (package source) is by Jose Gonzalez. Make sure to install it:

    $ brew tap josegonzalez/homebrew-php

    We also need a tap for a PHP 5.4 dependency, zlib:

    $ brew tap homebrew/dupes

    Install MySQL

    $ brew install mysql

    It’ll chew on that for a few minutes, then we need to get it to run as our user account:

    $ unset TMPDIR
    $ mysql_install_db --verbose --user=`whoami` --basedir="$(brew --prefix mysql)" --datadir=/usr/local/var/mysql --tmpdir=/tmp

    I got a “Warning” during this operation, and while I don’t think it’s critical, I did this and things have seemed to work fine… if you got a warning during the last step, then you could do this:

    $ sudo mv /usr/local/opt/mysql/my-new.cnf /usr/local/opt/mysql/my.cnf

    Then, to launch MySQL at startup:

    $ cp `brew --prefix mysql`/homebrew.mxcl.mysql.plist ~/Library/LaunchAgents/
    $ launchctl load -w ~/Library/LaunchAgents/homebrew.mxcl.mysql.plist

    Done! Next: the web server.

    Install nginx

    $ brew install nginx

    Let that stew, then run these commands to have nginx run as root at startup (so we can listen on port 80, the default, instead of 8080 which is less convenient for development):

    $ sudo cp `brew --prefix nginx`/homebrew.mxcl.nginx.plist /Library/LaunchDaemons/
    $ sudo sed -i -e 's/`whoami`/root/g' `brew --prefix nginx`/homebrew.mxcl.nginx.plist

    (Okay, to be honest, this didn’t work for me to load nginx right away on start; I had to edit the /Library/LaunchDaemons/homebrew.mxcl.nginx.plist file and remove the two lines that specify the UserName key and value (one line specifies the key, the other the value). Then it worked.)

    Then create a log file… this allows us to view server logs in the Mac Console, which is really convenient, but isn’t required:

    $ sudo mkdir /var/log/nginx/

    (Don’t forget to tell nginx to put the log file there in nginx.conf: error_log /var/log/nginx/error.log;)

    Done! Next up: PHP.

    Install PHP

    $ brew install --without-apache --with-fpm --with-mysql php54

    Make sure to change “php54” to whatever version you want. At time of writing, PHP 5.4 is the latest stable, but PHP 5.5 is in alpha. I assume 5.5 would be php55, etc. Be sure to adjust any following commands with the proper version number.

    Quick note: Yes, OS X does come with PHP pre-installed. But we don’t want to use that. We need an install we can use with nginx and FastCGI Process Manager (fpm). Plus, we want the latest version, and I’m just not that into compiling from source.

    To run php-fpm at startup:

    $ sudo cp `brew --prefix php54`/homebrew-php.josegonzalez.php54.plist  /Library/LaunchAgents/
    $ sudo launchctl load -w /Library/LaunchAgents/homebrew-php.josegonzalez.php54.plist

    Done! Next up: configuration.

    Finishing up

    I want all php commands to be using the latest version, not the default PHP binary. So I use this little trick to create a symlink from the default PHP binary to the new one… I do this for both php and php-fpm. If you’re confused about which versions are where, use the “whereis” command, like: “whereis php”.

    $ php-fpm -v
    $ sudo mv /usr/sbin/php-fpm /usr/sbin/php-fpm.bak
    $ sudo ln -s /usr/local/Cellar/php54/5.4.11/sbin/php-fpm /usr/sbin/php-fpm
    $ php-fpm -v

    Notice that the version went from 5.3 to 5.4 (in my case). Now for the php binary:

    $ php -v
    $ sudo mv /usr/bin/php /usr/bin/php.bak
    $ sudo ln -s /usr/local/bin/php /usr/bin/php
    $ php -v

    I also added /usr/local/sbin to the PATH by adding that directory to the /etc/paths file, then restarting Terminal. You can see your current PATH by typing echo $PATH.

    Important config files:

    /usr/local/etc/nginx/nginx.conf
    /usr/local/etc/php/5.4/php.ini
    /usr/local/etc/nginx/fastcgi_params

    You’ll probably want to change these for your

    The nice thing about Homebrew installations is that you generally don’t need sudo to use or manage these services, since they’re in /usr/local.

    Alright. Well that did it for me. Enjoy your new dev environment!

    You can stop nginx with nginx -s stop, and start it again with just nginx. You can also just reload the conf file with nginx -s reload.

    I installed MySQL Workbench and was able to make a connection to the localhost MySQL server by adding a connection to host “localhost” with no password. The only thing I typed was that hostname and everything worked like a charm.

    I did use my nginx.conf file from my previous install; you can view a sample conf file if you need it, in my other post about using Macports to do this (link at top of this post).

    End of Mathew’s text

    _______________

    In my case, I skipped the homebrew nginx installation because I require openresty (i.e compile nginx with the Lua module support)
  • My JavaScript Game OpenSourced

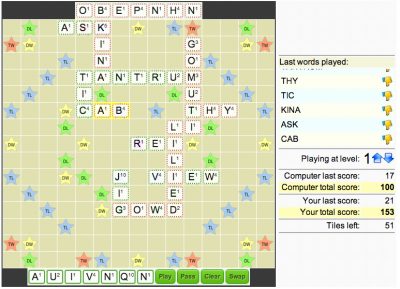
    The JavaScript Scrabble game that I wrote almost a year ago has been sitting abandoned so I released it as public domain at github for the off chance that someone would like to join the development.

    The game is here: http://amnond.github.io/jscrab/
    It can be cloned from: https://github.com/amnond/jscrab

  • A year since I quit

    So, I was wondering what have I actually spent my time on and was it wisely spent ?

    • About of month writing software to simulate forex trading. Downloaded and cleaned years of 15 minute resolution forex data – put it all in a database (sqlite) created software in C++ to test various plug-in algorithms (in Lua) to try and predict market trends. Looked really cool but number of products in this space caused me to abandon it. No, I didn’t find an algorithm that would miraculously guess the forex trends.

    • Joined a cyber-security startup for four months. Great founder, great idea. I know I’ll be hearing of them in the news, but my path goes elsewhere…

    • Another two months – Created a system for automating work assignments. Created a working solution for two hospitals (on call/on duty posts for Doctors) but realized that at least in the departments I was working with, there are other considerations in addition to efficiency and correctness of the solution, such as “now the computer will be in control – this is bad…”. In addition, here too I noticed that the competition has established itself in this market and the investment was just not worth it.

    • Another two months writing a blazing fast, unbeatable, multilingual Scrabble game against the computer with animations, drag & drop and other cool stuff entirely running on JavaScript in the browser – was about to market it in various ways when…

    • Now three months into a new startup with 3 other great founders.

    Conclusions:
    I had hoped to have had some revenue streams by this time based on various products. As it stands, time really goes by quickly and I could have probably have spent the time more wisely by sticking to some carefully selected e-commerce applications and following through – but at this point I still have no regrets – it is fun, educating and still far from over 🙂

  • Bootstrap navigation tabs without using anchors

    Well, almost – but the required effect is achieved.

    The problem with using anchors in a dynamic web page is that you don’t always want to show the corresponding href in the browser’s status bar when the user hovers over the anchor link.

    Twitters Bootstrap navigation tabs are designed to work with anchor elements. I wanted to use these tabs without showing the corresponding anchor links in the browser’s status bar.

    solution is as follows (the assumption is that bootstrap.css is included of course):

    Add this to your CSS file:

    .link {
            cursor:pointer;
            color:blue;
    }

    And create the tabs as follows:

    <ul class="nav nav-tabs">
    
      <li id="tab1" class="active">
            <a>
            <span class="link" onClick="firstTab()">
            First Tab
            </span>
            </a>
      </li>
    
      <li id="tab2">
            <a>
            <span class="link" onClick="secondTab()">
            Second Tab
            </span>
            </a>
      </li>
    
    </ul>

    Just add the corresponding DIVs and make them hidden or shown accordingly in the event that a tab is clicked.

    Per Nick’s request, here’s a small self contained example for one way of accomplishing the above:

    <!DOCTYPE html>
    <head>
        <link rel="stylesheet" href="https://maxcdn.bootstrapcdn.com/bootstrap/3.3.5/css/bootstrap.min.css">
        <script>
            function firstTab() {
               putTabText("<br/> Hi, I'm the content of <b>Tab1</b>");            
            }
    
            function secondTab() {
               putTabText("<br/> ... and I'm the content of <b>Tab2</b>");            
            }
            
            function putTabText(str) {
                document.getElementById('idContent').innerHTML = str;
            }
        </script>
    </head>
    <html>
        <style>
            .link {
            cursor:pointer;
            color:blue;
        </style>
        <body onLoad='firstTab()'>
            <div class="container">
                <ul class="nav nav-tabs">
                
                  <li id="tab1" class="active">
                        <a>
                        <span class="link" onClick="firstTab()">
                        First Tab
                        </span>
                        </a>
                  </li>
                
                  <li id="tab2">
                        <a>
                        <span class="link" onClick="secondTab()">
                        Second Tab
                        </span>
                        </a>
                  </li>
                </ul>  
              <div id='idContent'></div>
            </div>      
        </body>
    </html>
  • Thought of the day – don’t confuse the fight for the battle

    Every now and then I formulate to myself some thoughts and current conclusions regarding things in general – be it life philosophy and everything that is derived from it. I’m going to start and write these down just to have them placed somewhere either for others to contemplate or for my future self to laugh at 🙂

    So, the first is about a thought regarding when to give something up. The rules are:

    1. Never ever give up the battle.
    2. Know when its time to give up the fight.
    3. Don’t confuse the fight for the battle.

    How do you know what is a fight and what is a battle – that’s the million dollar question, but I believe there’s a very good indicator: if the signs show that it is unwinnable, then it is a fight and not a battle – time to give it up.

  • Handling RTL and LTR

    This is mainly a note to myself. Two tools to help convert pages from LTR to RTL text directions:

    RTLit
    Convert your CSS-formatter file from left-to-right to right-to-left

    CSSjanus: http://code.google.com/p/cssjanus/

  • Compiling OpenResty (nginx) on OS/X

    When building OpenResty (the excellent Lua add-on for nginx) on OS/X I got the following error:

    Undefined symbols for architecture x86_64:
      "_pcre_free_study", referenced from:
          _ngx_pcre_free_studies in ngx_regex.o
          _ngx_http_lua_ngx_re_match in ngx_http_lua_regex.o
          _ngx_http_lua_ngx_re_gmatch in ngx_http_lua_regex.o
          _ngx_http_lua_ngx_re_sub_helper in ngx_http_lua_regex.o
          _ngx_http_lua_ngx_re_gmatch_cleanup in ngx_http_lua_regex.o
          _ngx_http_lua_ngx_re_gmatch_gc in ngx_http_lua_regex.o
          _ngx_http_lua_ngx_re_gmatch_iterator in ngx_http_lua_regex.o
          ...
    ld: symbol(s) not found for architecture x86_64

    To cut a long story short, download the latest version of pcre (PCRE – Perl Compatible Regular Expressions) from ftp://ftp.csx.cam.ac.uk/pub/software/programming/pcre/, extract it to a directory, say /Users/me/pcre-8.21/ and then from the ngx-openresty source directory run configure with:

    ./configure --with-luajit --with-pcre=/Users/me/pcre-8.21/

    all will be well…

    —– update from Sept 2013:

    I realised that perhaps a better way to install PCRE would be to install homebrew on your Mac and then just:

    brew install pcre

    however, you will need to know where homebrew installed pcre as you will need to add that parameter when running configure. There are several ways of locating a file on the Mac (I’ll refer to the command line only. The grep is since I know it is installed somewhere in /usr/local):

    • mdfind (uses spotlight), for example:
    mdfind pcre | grep usr/local
    • a combination of
    sudo /usr/libexec/locate.updatedb

    and then

    locate pcre | grep usr/local
    • or just plain old find:
    find /usr/local -name pcre -print

    in my case the location was /usr/local/Cellar/pcre/8.33/ so the configure parameters were:

    ./configure --with-luajit 
                --with-cc-opt="-I/usr/local/Cellar/pcre/8.33/include" 
                --with-ld-opt="-L/usr/local/Cellar/pcre/8.33/lib"
  • Quick guide to Google closure compiler tool

    Google’s closure compiler is an impressive tool that parses JavaScript code and make various optimizations on it, including minimizing its size.

    This post will provide what is needed to effectively utilize it in minimum time.

    Step 1 – verify consistant property access methods in your code

    The first thing you should do is make sure you have a consistent way of accessing object properties in your code – i.e don’t have one place in the code setting a property of some object, for example like this:

    obj["hello"]="there"

    or

    return { "hello":"there" }

    while in another place in your code you access it via the dot notation, e.g:

    myobj = obj.hello

    The reason this will cause problems is because the closure compiler will not rename strings but will rename the access fields in the dotted notation – which will of course cause problems in this case.

    Step 2 – list the files that can be clumped together in one compilation

    The more files that can be compiled together with Google Closure compiler, the less you will have to deal with defining external functions and variables (i.e, those that are used by the compiled code but are defined in external/uncompiled code) or exporting variables and functions (those that you don’t want the compiler to rename since they are used by external/non-compiled code.

    Step 3 – list internal functions and variables that non-compiled code needs to access

    Go through your code and list the functions and variables that you don’t want to be renamed by the Closure compiler since they have to be accessed by Javascript code that will not be compiled (You also need this if you have strings in the compiled code that are evaluated at runtime as function calls since strings are not changed by the compiler).

    So, for example, say you have the following in the code you want to compile:

    document.mydiv.innerHTML="<a href='#' onClick='myFunc1()'>Click</a>";
    function myFunc1()
    {
        alert("link was clicked");
    }
    
    function myFunc2()
    {
        alert( "my API function was called" );
    }

    You will need to export MyFunc1 (because it is called from within a string) and MyFunc2 (because it is called from outside the compiled code).

    The way to export functions so that they can be accessed after they are renamed by the compiler is to do the following trick – just add to your code:

    window["myFunc1"]=myFunc1;
    window["myFunc2"]=myFunc2;
    window["myObj"]={};
    window["myObj"][myMethod"] = myObj.myMethod;

    This way, the compiler will rename myFunc1 and myFunc2 in the optimized code (and also myObj.myMethod), but the outside code will still be able to access them by their original name.

    Step 4 – list external functions and variables that compiled code needs to access

    You need to let the closure compiler know which function calls and variables should not be renamed since the original name is needed to be able to call the external function/variable.
    For example if you need to access an external variable named g_mymap and an external function named myinit then create a file named externs1.js for example which contains the following:

    var g_mymap;
    function init( str ) {}

    Step5 – Compile!

    java -jar compiler.jar --compilation_level ADVANCED_OPTIMIZATIONS  
                           --js=../src/script1.js 
                           --js=../src/script2.js 
                           --js=../src/script3.js 
                           --js=../src/script4.js 
                           --externs ../src/externs1.js 
                           --js_output_file=../release/code.js

    Note that in the above example script1.js to script4.js are the scripts who’s variables and functions will be renamed in the optimization process, externs1.js contains the list of external functions and variables that you wish to access from within the compiled code (and thus you don’t want to be renamed – see step 4) and code.js will be the minimized and optimized code produced by the Google Closure compiler.

  • More progress on JavaScript Scrabble

    I’m excited at the speed of the computer’s moves. Almost all moves take less than a second on my MacBook Air (1.86 GHz Intel Core 2 Duo) – the times when a move requires about 3 seconds is when the computer analyses how to play a joker. Did I already mention this is pure JavaScript running on the browser ?

    Its amazing how far JavaScript has come, from being considered a toy language for running some checks on form inputs to being recognized as the powerful (though sometimes quirky) language that powers the Internet today.

    New features
    New features
  • Fastest Scrabble Algorithm ?

    After making a small change, I’ve managed to improve the algorithm so that the computer will make a move in under a second every turn. Considering this is all written in pure JavaScript and runs on the browser, I’m starting to wonder whether the algorithm I wrote is the fastest existing scrabble algorithm out there…